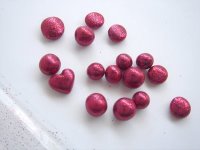
Clay expert Marie Segal demonstrates how to create lasting glitter beads for jewelry, gifts or home accents. These glitter beads require no varnish.
Materials:
Materials:
- Christmas red Cernit
- Red Cernit
- 5/16" Round cutter
- Art Institute Ultra-fine Glitter in Cranberry Red- opaque colors work best for me.
- Pasta machine
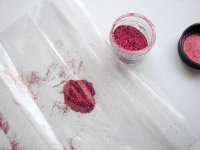
- Ziploc sandwich baggie
- Place about a 1/2 teaspoon of glitter in to a baggie.
- Mix 1/8 block of Christmas Red and 1/8 block of red together until it is one color.
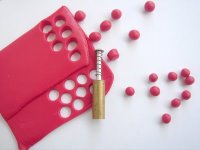
- Condition and roll out red clay on the thickest setting in the pasta machine.
- Fold the sheet in half for double thickness or leave a single layer for smaller beads.
- Cut out double or single rounds with the cutter. By using the round set of brass cutters with plungers and double and single thick sheets in the pasta machine, you can have any size bead you want all the time, every time.
- Roll all the cut out pieces in to balls.
- When I made things a long time ago, I could pinch off balls of
color the same size almost every time. When I got busy Howard would
help, he could not pinch off balls of clay the same size all of the
time.
- Howard came up with this unit of measurements when I was doing
mass production to keep all of the pieces the same size and weight back
in 1984. I had recipes and codes for the cutters and pieces of each
ornament or magnet. Every item had it's own recipe card. I could have
someone cutting out pieces and rolling them in to balls for me so that I
could slam the pieces together and they would still look like I made
them one at a time and individually, and every piece weighed exactly the
same weight. This also made it much easier to have people helping me
when things got out of hand at holiday time and to train people to help
and do the work I was doing. Everyone started as a clay mixer and ball
roller. Now that is something to aspire to, eh?
- Drop one ball at a time in to the bag and shake the bag. The glitter will cover the ball.
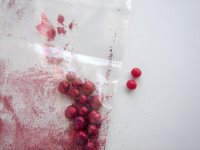
- Add one at a time this way until all the balls are covered.
- Now lay the bag on your work surface and use the bag to roll the
ball to the top of the bag. As you do so you will roll the glitter in
to the clay and get rid of any excess before you take it out of the bag.
- Remove the ball and roll between your palms to press the glitter in to the surface of the clay.
- Do this with each and every ball.
- When all the balls are covered with glitter and rolled you can
then shape them in to different shapes, balls, hearts and flattened
ones.
- Bake in a pre-heated 275 degree oven for 30 minutes shut of the oven and let cool.
- I drill the holes as I need them with a wire bit and a hand drill. I do not coat my beads with a varnish.
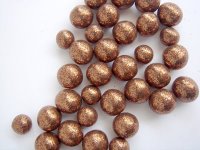
- When I make brown glitter beads I use the closest color of Cernit that I can find.
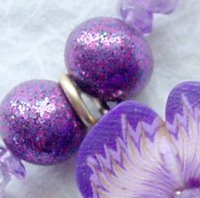
- When I do purple Beads
- And aqua beads.

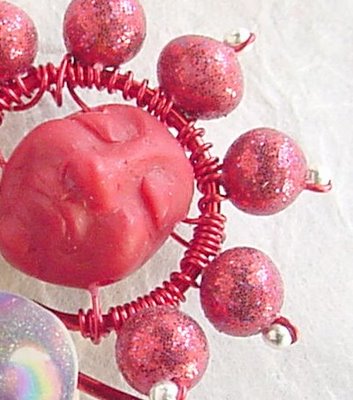
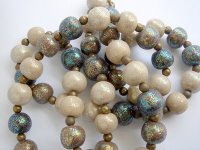
- Here is a picture of a Necklace I did in the late 80's with
another glitter, it is no longer available. This is fimo classic and the
glitter is holding up fine with no coating.
- The Art Glitter is actually a better glitter for this technique because it is a much smaller cut. These glitters are made for fabrics and will hold up to the heat of the oven. Other glitters have a lower melting temperature and will look bad after baking. Unless of course that is exactly what you are looking for.
No comments:
Post a Comment