You might of read on here I do not read nor follow directions, I prefer to create something new. This is my 2013 winter hat. It was made with double strands of yarn and a size K hook. The flowers were made with a size f hook. This is what I did and it took about 2 hours and three partial skeins of yarn.Sorry but for somereason the red doesn't look red in the pictures.
Needed Items
1 partial skein red
1 partial skein red, white and green mixed
1 partial skein white.
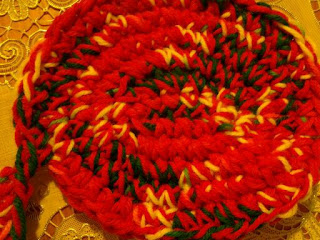
first I made a strand of 8 stitches with the two yarns together red and red/white/green and then croched regular stitches around and around until you reach the desired beanie size for the top. For that I used my head and when it was the size of a jewish beanie I stopped. this is what it looked like. It was going in circles adding stitches tw in each space every other row, and adding only what would even it out in the odd rows. It was 7 times around I believe.
Note the tail on this picture. from the circle you will add 10 stitch loops and begin stitching that as you would a skarf. until it looks like this.see how it is held there by one stitch inbetween the circle and the strip. You will continue stitching until it ends up like this
Check if you have enough to go around the beans there should be one stitch per stitch for both the circle and the strip. then you simply stitch the top to the strip and then stitch the back seam together. You will now have this. minus the three rows I did to finish off the bottom. This is where you use as many lines as you need to make the hat as long as you need to cover ears.
For Men just stop there. But if you are making it vintage with the flower continue on.
The flower
The flower is very simple it is simply a straight stitch. You start by (I used white) and make 10 stitches then stitch up one side and down the other. now not stopping your add 10 stitches for the second pettle and stitch up one side and down the other and then back to the center so this one with be stitched on one side twice and one side once, then repeat the 10 stitches for then next pedal. so that for all five strands. then when all five are done stich the last double side to the first pedal making them all the same and the grouping stronger. They will look like this.
Notice how they want to curl. you will use that to your advantage when you put them on your hat.
Now just stitch a circle starting with 4 stitches and going around not adding stitches. then pull it together in the back. Note: Next time I will stuff with cotton but I didn't this one.
Then simply add the circle center to the pedals of the flower and stitch to the hat at the center and peg stitch the pedals where the fold is. that way it looks more like like.
This is the finished hat. Total time maybe 2 1/2 to three hours and used around a half a skein of each of the red and red/green/white.I used very little of the accent white. I made this yesterday while My husband made breakfast.
1/4/2013
man the new year already. here is a alternative color with a bigger flower, plus it was made with a totally round top making it more Boxier like they used to be.
Yes that is me.


No comments:
Post a Comment